The Ultimate Beginner Friendly Sourdough Bread Recipe You Need to Try
- Jessica Ruzicka

- Feb 1
- 9 min read
Sourdough bread has become a favorite for many home bakers, but starting out can feel intimidating. The good news is that making nutritious sourdough bread doesn’t have to be complicated or overwhelming. My goal has always been to keep it simple, yet effective.
Yes, sourdough is a science but we are not scientists or working in a bakery where things MUST be exact EVERY time. We are simply trying to make healthy bread for our loved ones. This is the same recipe I've been using in my Sourdough 101 Beginner classes for the past four years. I have yet had a student report that it failed. It is designed to be approachable and reliable for anyone new to sourdough baking. With a few simple steps and some patience, you can enjoy fresh, crusty sourdough bread made right in your kitchen.
What Makes This Recipe Beginner Friendly
Many sourdough recipes call for precise timing, special equipment, or advanced techniques. This recipe strips all that away and focuses on what really matters: a healthy sourdough starter, simple ingredients, and clear instructions. Most recipes are high hydration, (high water content) which makes the dough even stickier and harder to work with as a beginner, which can be intimidating and discouraging. This dough is low hydration, easy to work with and when paired with the "Aliquot" technique, (I'll explain more below) it takes all the guesswork out of finding that "sweet spot" in bulk fermentation, allowing you to learn and build confidence as you go. You’ll get a feel for how the dough should look and feel at each step, which helps you develop intuition for future bakes.
Click below for a PDF of the recipe.
Most important : Understanding Your Sourdough Starter
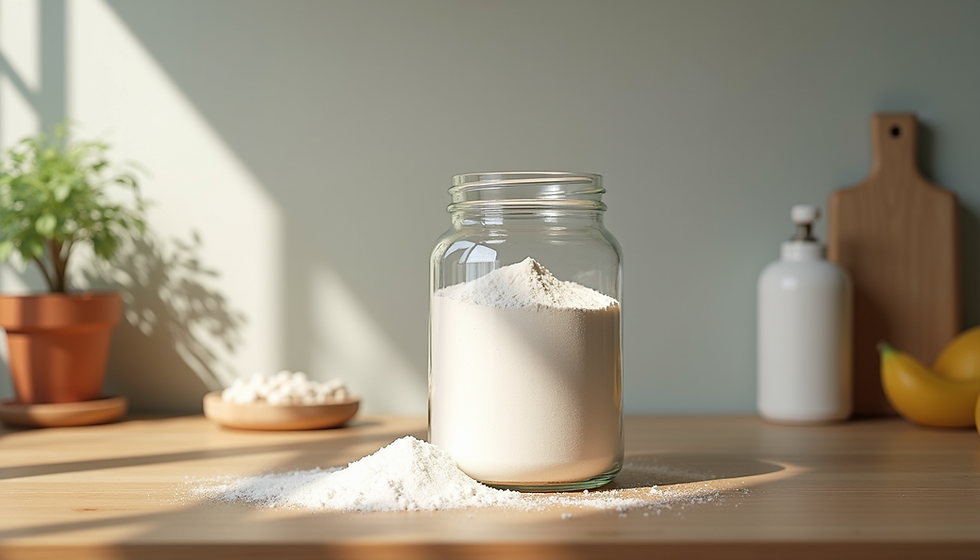
Your sourdough starter is the FOUNDATION of your bread. You can do ALL the things right, but have an acidic & weak starter, and it still won't turn out well even though you did every thing"right". Spending some time to fully understand and get to know your sourdough starter is an important step. Your starter is simply a mixture of flour and water that has been converted to a leavening agent through the process of fermentation.
There are wild yeasts and bacteria all around us. In the air, on your skin, in the wheat grain that's been ground into flour. You are culturing a symbiotic relationship between those wild yeasts and bacteria that is extraordinarily similar to what naturally happens in your digestive system.
So, you're essentially eating a pre-digested grain. Which is why it is SO much easier to digest, healthier for you and why there are many with sensitivities and blood sugar issues , have reported they CAN eat real sourdough and it not affect them negatively. For a more detailed post on How to feed and maintain your sourdough starter, you can find that HERE.
This natural culture of wild yeast and bacteria that ferments the dough, gives sourdough bread its unique flavor and texture. If you don’t have a starter yet, you can create one at home with just flour and water over about 10-14 days, or you can purchase some of my dehydrated sourdough starter that is simply dormant, and will rehydrate and be active in as little as 5 days.
Let's talk about the life cycle of your sourdough starter.
Once you understand this, the bread making process is going to make more sense.

It looks something like this:
FEED-->RISE-->PEAK-->FALL-->DISCARD & REPEAT the cycle.
Where you are trying to catch it, to use in any recipe that calls for "Active/Bubbly Sourdough starter", is at its PEAK, before it's had a chance to fall all the way back down and technically become weak and considered inactive 'discard' at that point.
PEAK is the stage that your starter is at its most balance, active & strongest stage, which will give you the best foundation possible.
Before we get into the recipe, let's quickly talk about DISCARD. I hate that word "discard" because it makes you think you have to throw it away. This of discard as LEFTOVERS. It's simply unfed, inactive starter at a different stage in the cycle but can at any point be fed and turn active again.
The reason you want to discard, meaning take some out before you feed it , is because if you never took any out, you would quickly end up with buckets and buckets of sourdough starter, [because remember, you must always feed it at minimum equal parts starter;flour;water] and that's just a waste of time and flour. So , take some out, put it in a separate jar that you've labeled "Discard" [use that for unlimited Discard recipes], then feed your starter as normal.
Just for fun, using the graphic below, let's see what would happen if you never discarded.

Again, remember that you must always keep in mind as a rule, to keep your starter balanced, you must always feed equal parts. You see, if you fed your starter once a day without discarding for a week, you would end up with over 130 lbs of starter! Can you imagine!?
Take advantage of the discard though, and use it in any discard recipe. Or heck, if you just have a huge pileup of it and can't use it quick enough, dump it on a hot cast iron skillet, season with everything bagel seasoning and its SOO delicous just like that. My kids like to use it as a extra tangy mini pizza crust. Delicious I tell ya!
What is the ALIQUOT METHOD?
The secret weapon for beginners and what I teach in my beginner sourdough classes. As you practive & learn how to read your dough, know what it should look and feel like, this is an amazing tool to help boost your confidence. Imagine a baby dough. A small cup that holds a sample of your mama dough that allows you to monitor the progress with precision, providing insights into it's rise, activity and readiness for baking. When used correctly, you will know when your dough has reached that sweet spot in the fermentation process or whether it needs more time before shaping.

How big should an Aliquot Cup be? Ideally a 2 oz condiment cup works perfect. It should be able to fit 40g of dough inside and allow it to expand until its doubled. You don't want it so small that you can't get the 40g in, but too big and it defeats the purpose.
My recipe instructs you to pinch off 40g of dough into your 2 oz aliquot container during the second set of stretch & folds. This timeframe has allowed you to initially mix your dough, let it rest an hour to let the flour hydrate, complete one set of folds to begin developing the gluten structure in your dough, rest another 30 min and THEN , its ready for your 40g sample aliquot. ALWAYS keep your baby dough with your mama dough. I'm talking in the same bowl , covered together. If they are separate, they will likely be at different temperatures and environments and you want them as similar as possible.
Continue with the remaining stretch/folds followed by a time of rest where you just let it continue to rise at room temp, and once the dough hits the top of that aliquot cup, THAT is your sign that it's time to dump your dough out, shape it, and get it into the banneton and fridge for a long overnight ferment. That aliquot cup full is your sign that the 'sweet spot' in bulk fermentaion is reached. You still want to practice those visual queues on how to tell that bulk ferment is complete but this is a clear signal for you as a beginner, until you are more confident in determining bulk fermentation is complete.
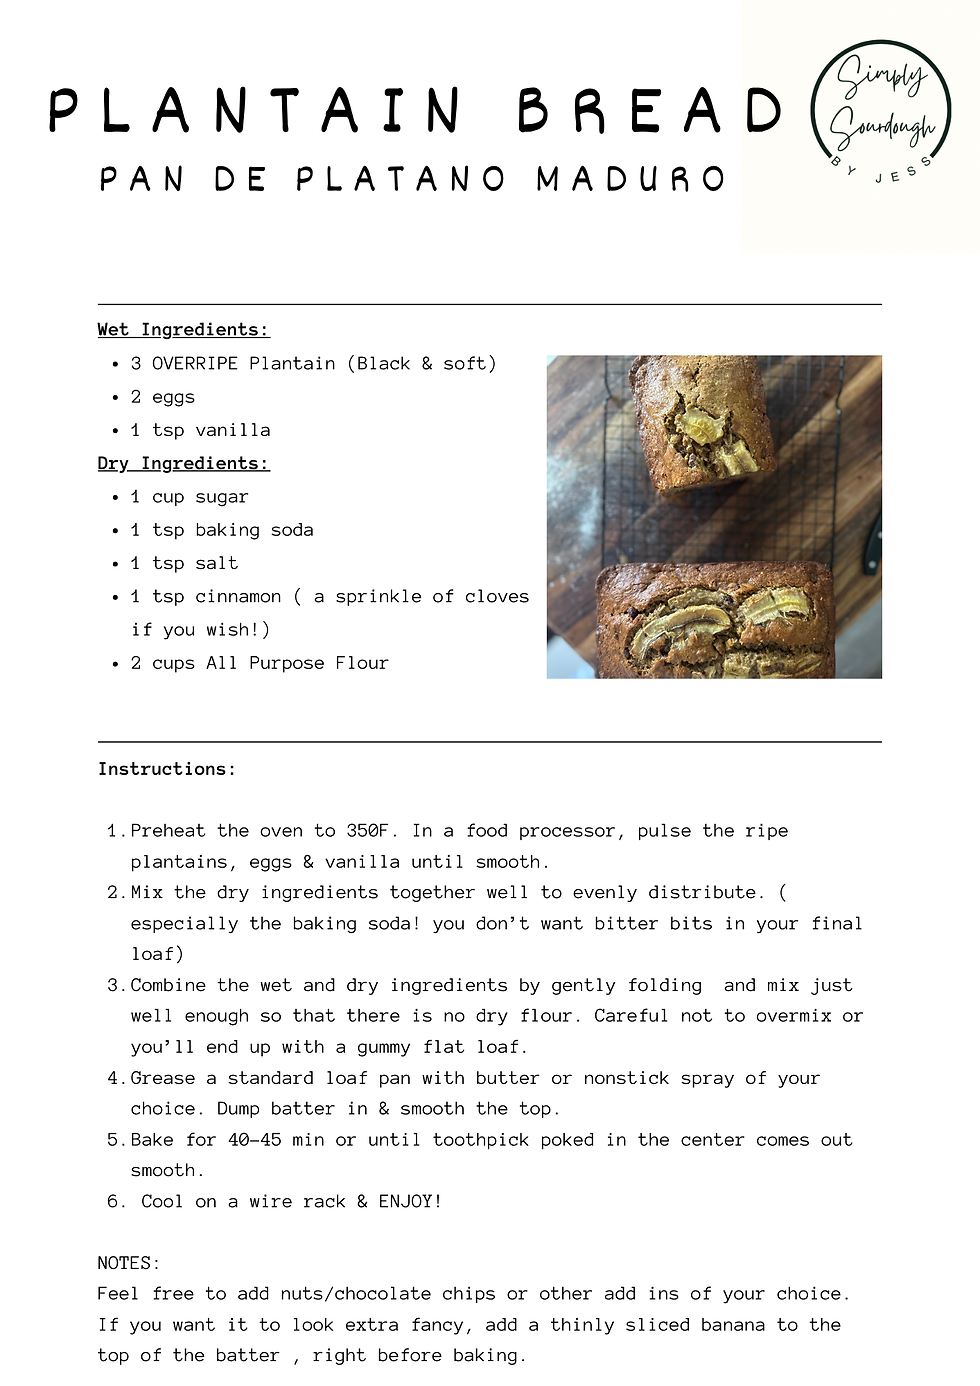
THE RECIPE:
Ingredients You Will Need
500 grams. of strong bread flour
330 grams water (room temperature)
65 grams active & bubbly sourdough starter
10 grams salt
Step-by-Step Instructions
1. Mix the Dough
Add the 65g active starter to a large bowl. Mix in 330 room temp water and stir until dissolved. Once you have a milky liquid, add the 500g flour and 10g salt. Mix until a thick, shaggy dough forms and there are no more dry flour bits. Alternatively, you can use a stand mixer with a dough hook and mix for a few minutes. Cover with foil or plastic wrap (you want to keep the moisture in!) and let the dough rest for 1 hour.
2. Begin a series of stretch and folds.
Next, you will work on a series of 4 stretch and folds with a 30 min rest period between each set. After your dough has rested the inital hour after mixing, grab a corner of the dough and gently stretch it up and fold over towards the center. Repeat on all four sides of the dough. That is ONE 'set' of stretch&folds. Let dough rest for another 30 minutes and repeat the stretching and folding action every 30 min for the next 2 hours. Running short on time? Do the slap & fold & lamination we performed in Class! Here is a YouTube video where I demo these steps. After your 2"' set of folds, Now is the time to pinch off 40g of dough into your 2 0z Aliquot cup. Remember to keep it Covered, & placed INSIDE your dough bowl the entire time.
3. Bulk Fermentation
After all your stretch and folds are complete, there is a period of rest to let your dough finish fermenting. Cover the bowl and let it rise at room temperature. Estimated 4-6 hours, depending on your temperature. In the winter, the dough will take longer , in the summer it will rise faster. The dough is ready when it has increased between 30-50T in volume, has a few bubbles on the surface of the dough, juggles like jello when you wiggle the bowl AND your aliquot cup dough should have reached the top and is touching the lid.
Remember, it's best to rely on visual cues as opposed to time to determine when the bulk fermentation is complete. A few rough estimates for you:
At a temp of 80F, it will likely take 6 hours.... At 78F , it could take 7 hours ... At 76F, it could take 8 hours...At 74F, it could take 9 hours...At 73F it could take 10 hours... As you see, the cooler the temperature, the longer it takes so keep that in mind and use that aliquot to help you.
4. Shape the Dough: Pre-shape
Shaping the dough is a 2 step process. First a Pre-shape, a brief 20-30 min rest, then a final shape. This ensures adequate surface tension to help it hold its shape while it's in the fridge for a long, cold ferment, so it won't fall flat when you go to bake it tomorrow. To complete the pre-shape, coax the dough onto a lightly floured (or damp) surface. Gently shape it into a round: fold the top down to the center, turn the dough, fold the top to the center, turn the dough & repear until you've come a full circle and have a round ball of dough. Let it rest for 20-30 minutes.
Meanwhile, line an 8 inch banneton basket or bowl with a flour sack or towel, lightly dust with flour.
5. Final Shape
Perform the caddy clasp final shaping technique as demonstrated in this video. [OR whatever final shaping method you prefer ]and place in your prepared bowl, seam side up.Let it rest an additional 10 min, then gently pinch the seams of the dough as necessary to ensure a tight dough ball.
6. Cold Ferment
Cover the dough with plastic wrap, foil, a cotton bowl cover or whatever you prefer and place the dough in the fridge overnight or 8-10 hours. This is where it will develop that deep flavor that we all love about sourdough.
7. Bake Your Bread
When you're ready to bake the next day, place a dutch oven in your oven and preheat to 450F. Leave your dough in the fridge while the oven is preheating. Once it is preheated, gently turn your dough into a parchment paper, score the dough with a small razor blade, bread lame or sharp knife and transfer to your hot dutch oven. Cover with the lid and bake COVERED for 30 minutes. After 30 min, remove the lid and bake another 15 min OR until the internal temperature reaches 205F.
Transfer to a cooling rack and let cool off for a minimum of 1 hour before slicing. This allows the crumb to set and prevents it from becoming gummy.
Tips for Success
Use a kitchen scale to measure ingredients accurately.
Keep your starter healthy by feeding it regularly.
Adjust water ever so slightly if your dough feels too dry or too wet.
Be patient: sourdough bread takes time but rewards you with flavor and texture.
Experimenting and Making It Your Own
Once you master this beginner sourdough bread recipe, you can start experimenting! Try adding seeds, herbs, or olives for different flavors. Use different flours like rye or spelt to change texture and taste. You can also adjust hydration for a lighter or denser crumb.
Baking sourdough bread is a rewarding journey. Each loaf teaches you something new about fermentation, gluten development, and flavor. This recipe is your first step toward becoming a confident sourdough baker.


Comments